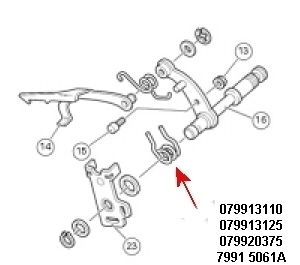
| Factorini Provente Ducati "Number 29" Lighter Shift Shaft Return Spring Lighter lever pressure. Find neutral easier. (ask how that works - it has to do with required gross muscle control to shift over the full height shift star "arms" vs. the fine muscle control required to "find" the little "divot" in the 1/2 height Neutral "arm".). because it's easier to move the shift lever, it's less work to shift. Or if you are stuck in Gold Creek, Idaho with a broken stock spring. \\Thanks for the pics: Brett Redd |
|||||||||
| One of the
issues that some current riders run into when switching to Ducati from Japanese sportbikes is that Ducs shift differently. They require a lot more foot pressure to move the shift lever. Too much pressure. |
For when you decide that you want lighter feeling shift lever action for better feel. A lighter foot shift pressure is less unsettling. Decreases lever effort required to make a shift. Makes foot shift pressure more like other sportbikes. Find neutral easier. If you like your fancy rearsets, but no matter how you lube, shim, adjust the arcs, angles and lengths, it's still annoyingly stiff to shift? Get this spring. (this is not the Pro Shift Detent Kit install - that is a different kit) |
||||||||
recommended for trackday and racebikes for easier, smoother and less tiring shifting.  "Number 29" Lighter Shift Shaft Return spring $49.95 pn: z95-cntr-d748-114 replaces original Ducati # 079913110 079913125 079920375 7991 5061A |
By the way, your lighter gear change return spring works a treat. Dave Hickie October 2016 Just rode bike awesome shifting, smooth, smooth smooth thanks Mike Hoak August 2013 |
||||||||
|
This is a complicated job. On a scale of 1-10, it's about a
7. There are a lot of thought processes and mechanical procedures going on. It's 2-3 hours of work the first time. As always, you MUST have a Ducati Service Manual! |
|||||||||
| If this intimidates,
you..... Slowly step back away from the 1/2 air impact wrench...... Requires: Useful Ducati Tool, but optional: |
 |
||||||||
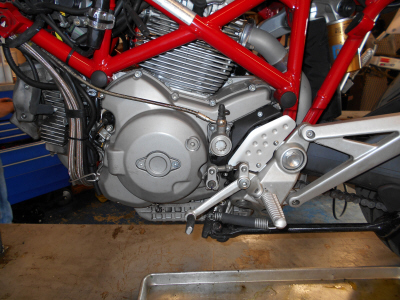
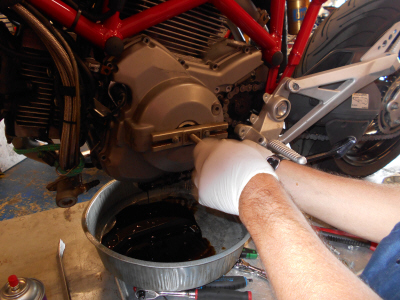
| Remove oil. Remove shift linkage. Remove clutch slave cylinder. Remove all engine cover bolts. |
.JPG) |
||||||||
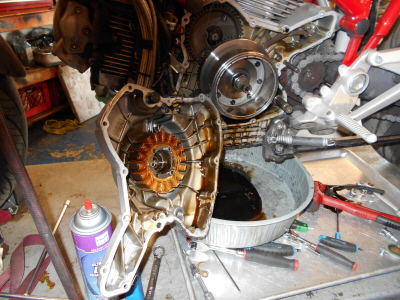
| Remove crank end cover. |
 |
||||||||
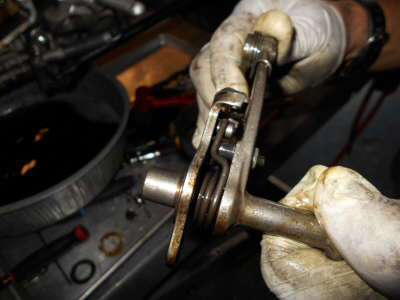
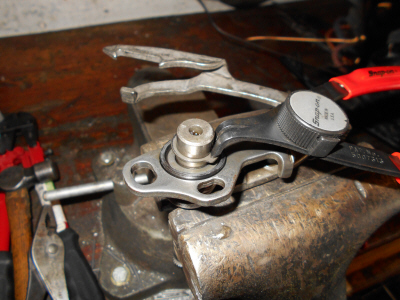
| Use proper 2 arm puller to press cover from the
end of the crank. Tap cover and check for hangups. |
 |
||||||||
| Magic! |
 |
||||||||
| With an impact wrench, remove the flywheel nut. It is regular thread. |
 |
||||||||
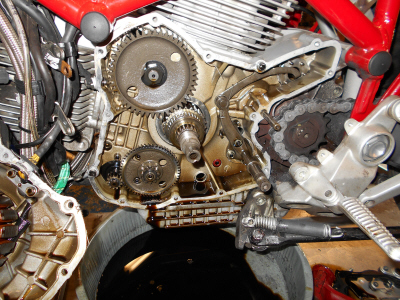
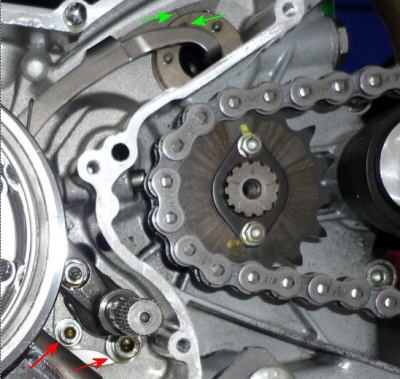
| Mark where the shift shaft base plate is - It's
slotted and adjustable and determines the offsets of the shift drum pins to the
shift shaft "fingers". Remove the 6mm allen and 8mm allen bolts from the shift shaft base. |
  |
||||||||
| Carefully wiggle out the shift shaft, paying attention to the shift shaft fingers, up at about 1 o'clock -- the end of the shift drum. |
 |
||||||||
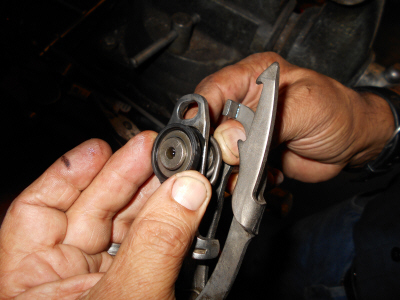
| Look at the shift shaft for spring orientation - then remove the circlip on the backside so we can replace the stock, too-heavy spring. |
 |
||||||||
| Remove the cupped washer. |
 |
||||||||
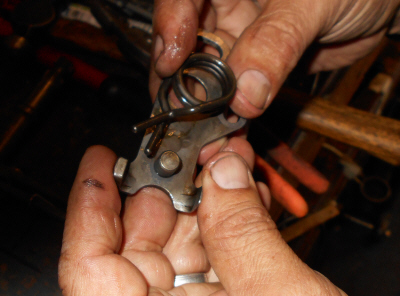
| The spring's "tall" arms are "away" from the
shift shaft arm. In this picture, the centering spring has slipped off it's locating pin and "crossed it's legs". The picture below shows the new F-Pro centering spring, "legs crossed" and "up in the air", properly installed. |
 |
||||||||
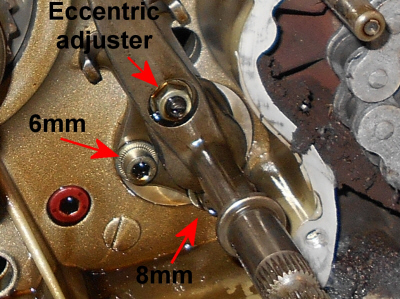
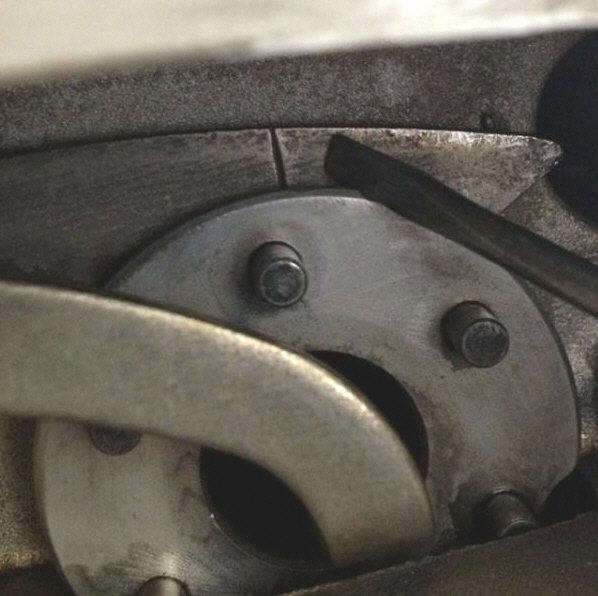
| Eccentric Adjuster - On the other side, it has a 6mm threaded stud with a screwdriver slot and 10mm locknut. |
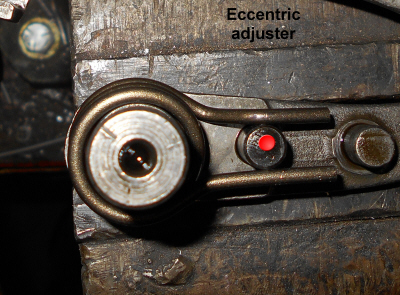 (yes, the spring legs at at the top of the eccentric pin) |
||||||||
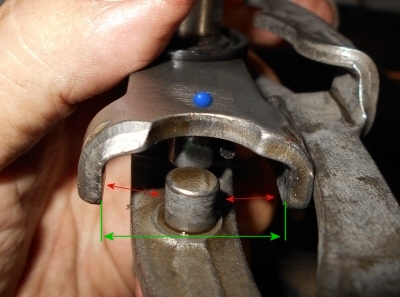
| Loosen up the 10mm locknut on the eccentric
adjuster and rotate it until the arms are centered equally on the fixed pin -
about like this. Make a note of where the screwdriver slot is (when arms are centered), remove the "arm piece". Carefully clamp the eccentric part of the adjuster, loctite and tighten up the 10mm locknut. Recheck to make sure the adjuster didn't turn while you were tightening the adjuster. Then assemble the "arm piece" and recheck the centering. The maximum finger width is 27mm - no more! Or it won't shift properly. Sometimes the shifter hits the ground and bends the fingers out. Minimum finger width is definitely no less than 26.7mm |
 |
||||||||
| Reinstall the shift shaft, with the loctited
6mm and 8mm allen screws in the
base plate - IN THE SAME LOCATION that they were in originally! or If empirically adjusting the shift shaft: Rough adjust: Align the scribe mark and the shift drum pin. Lightly snug the 8mm allen on the plate. Dial in: Attempt to shift. (while jogging the back wheel to line up the gear dogs to allow complete shifts) Try to shift all gears, both up and down. If you can't shift, then loosen the 8mm allen on the plate and "skosh" the arm over about 1mm, snug the 8mm bolt and try it again. And again, etc. With a little testing, you'll get an idea of the middle of the range where it shifts well. Put it there - that's the right location. Loctite and tighten your 6mm allen bolt in the plate and then loctite the 8mm allen bolt, too. |
 |
||||||||
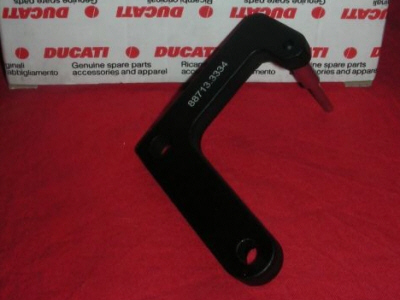
| or Install the Special Ducati Tool, #88713.3334 align and tighten the locking allens.NOW!! Work the shift shaft and make sure that it shifts through the gears! Remember that the rear wheel needs to be rotated back and forth to allow shifting through all the gears. |
 |
||||||||
|
This is where our MTS1100, 2007 ended up when perfectly set. This may NOT be where you end up. There IS a special Ducati tool to help set the shift arm properly - it's Duc special tool part #88713.3334. It's about $100. Tool available from: Commonwealth Motorcycles - Amanda - east coast Ducshop - Lorie - central Pro Italia - Karla - west coast |
 |
||||||||
|
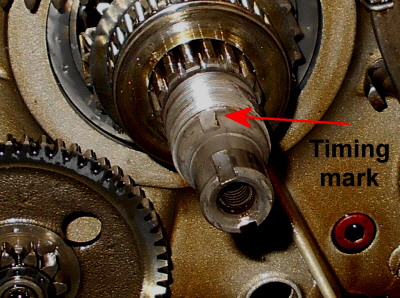
Reinstall the large, thin washer onto the backside of the needle bearing housing and slide the bearing and washer onto the crankshaft - Be careful the washer doesn't fall off the needle bearing and get crushed. Suggest using a dab of grease to hold it on. Install the starter clutch into the flywheel and line up the flywheel marks to the single timing notch mark. Install plate washer and reinstall the red or blue loctited crankshaft nut to Ducati torque
specs. Clean case and cover gasket surfaces with degreaser and lightly dab Three Bond non-hardening grey sealant OR your favorite Ducati concoction. I just don't want to see orange high temp silicone sealant on your Ducati. Replace cover screws and the crank cover, the clutch slave cylinder and external shift linkage. ADD OIL!!!! |
 |
||||||||
| Do all
safety checks necessary. Test ride carefully! Thanks to Chad at Commonwealth Motorcycles for the assistance |
|||||||||